Hosting a Simple Hello World Website on Nginx VM through ProxMox
- KevinsinghJ
- May 4
- 2 min read
This article would be about setting up a Nginx server inside a VM on Proxmox. What we’ll need to achieve this would be an up and running Proxmox VE, an ISO file (e.g., Ubuntu Server or Debian), in my case would be Ubuntu.
I have my Proxmox up and running, to achieve this, you can run it on any old machine too and not necessarily super fancy hardware. As long as there's a 64-bit processor, 8GB of RAM, an SSD for speed and at least 1 network card on the device.
So let’s start creating the virtual machine now. On my proxmox web console, i’ll be clicking on “Create VM”. Please also note that we can also get it created in a container with the option beside it “Create CT”. Some differences between a container and virtual machine would be that a container is faster and lighter as it shares kernel with host, lower resources would be needed for it, it starts almost instantly and it can only run on Linux systems. Whereas a virtual machine is fully isolated from the host, needs more resources (RAM, disk, CPU), slower startup but more flexible and secure, and it can run on any operating system.
In my example today, I am choosing to have this created in a virtual machine for no apparent reason actually.

After we click on create, we will have to choose the Node, VM ID and the name of the virtual machine. Once done, we can continue with the process.

Next would be to choose the storage, ISO image that you have downloaded, the type and version of the OS.

Next few images would be showing the options i have chosen

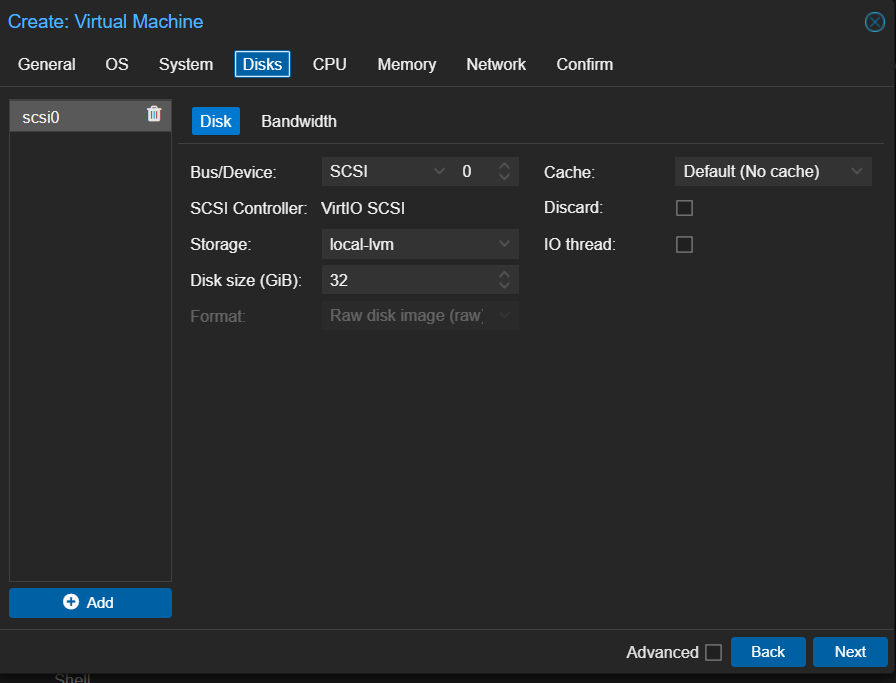

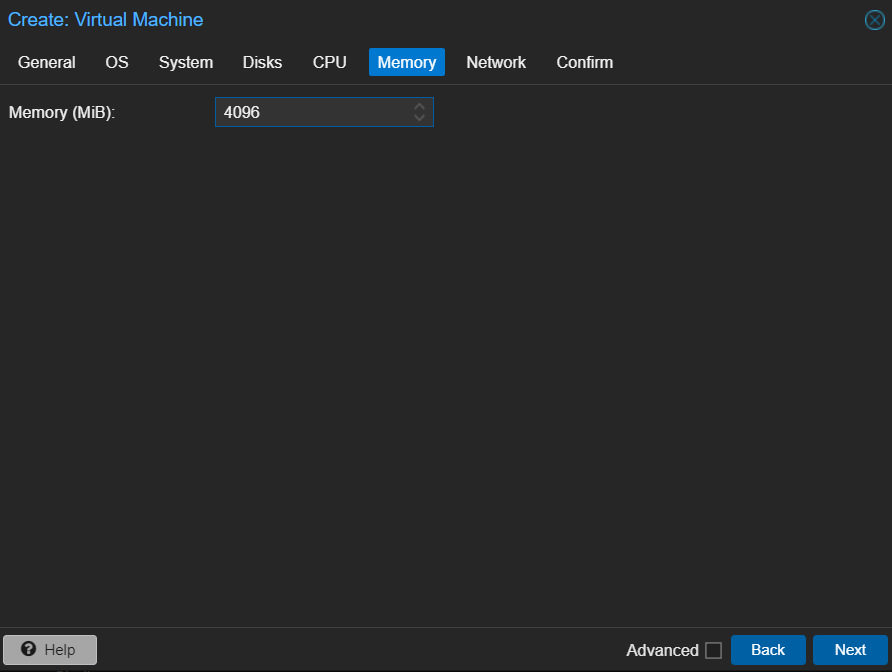


And once done setting it up, verify all of the info and click on Finish.


Once it’s done installing, you’ll be notified of it and just reboot it then.
Then you’ll be prompted to login, as mine below (i named it nginx)

Once login is successful, you’ll be able to access the command line interface. Here would be our next steps
Run sudo apt update

Then, next command would be sudo apt install nginx
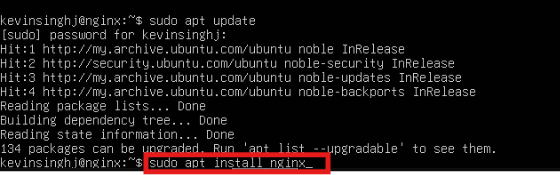
Type Y when you’ll be prompted whether to continue
The default Nginx config serves /var/www/html/index.html, so we’ll have to access this to write a simple html of “Hello World!”
Hence, run command sudo nano /var/www/html/index.html

Once you’re in the nano editor, type in the html
<!DOCTYPE html>
<html>
<head>
<title>Hello</title>
</head>
<body>
<h1>Hello World</h1>
</body>
</html>

And then save and close (press CTRL+O, then ENTER, then CTRL+X).
Next step would be to restart Nginx, by running command sudo nginx -t followed by sudo systemctl reload nginx

Next would be to run command ip a to obtain the server’s ip

So here’s the ip shown which is 10.0.0.127
Next to see the website, simply run http://10.0.0.127 on your browser (this machine has to be in the same network as the VM, as 10.0.0.127 is a private IP)

Here’s the website shown on my browser